Description
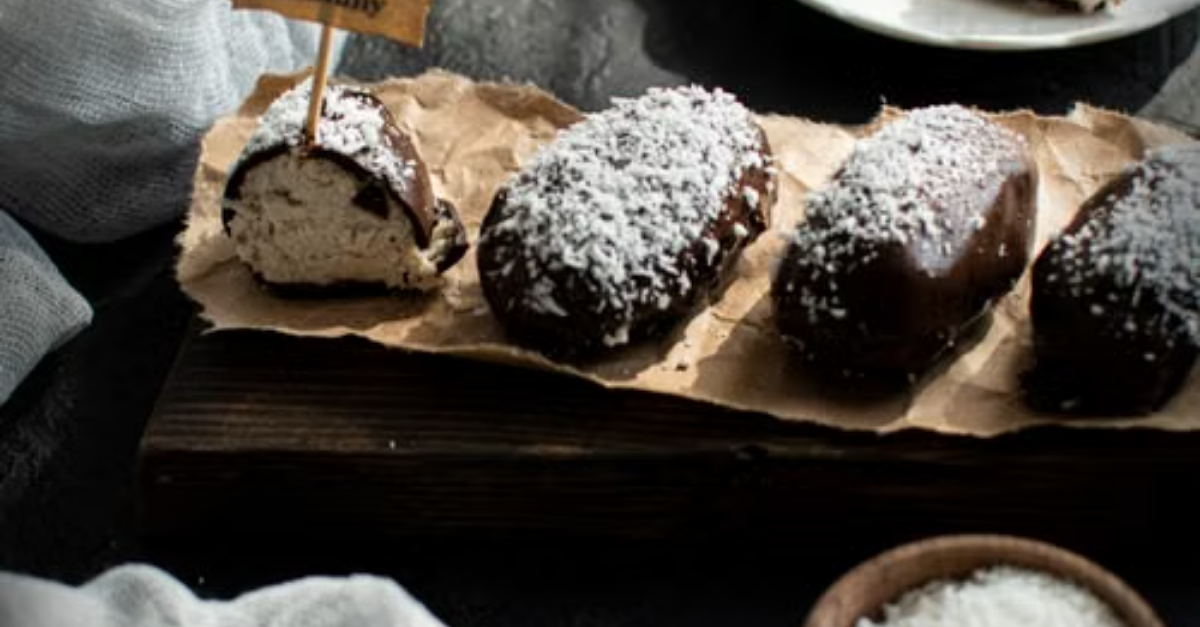
Imagine biting into a bar that combines the tropical sweetness of coconut with a rich, dark chocolate shell—all while packing a serious protein punch. These Homemade High-Protein Bounty Bars deliver that classic candy bar experience but with a nutritious twist that actually supports your wellness goals. The creamy coconut filling is satisfyingly chewy, perfectly balanced by the snap of smooth chocolate coating. Whether you’re craving a post-workout treat or a guilt-free dessert, this recipe proves that healthy eating doesn’t mean sacrificing flavor. Best of all, these bars come together quickly with minimal fuss—no baking required, just mixing, chilling, and dipping.
AdBlock Detected ⚠️
Please disable your ad blocker to support our website.
Advertising keeps our content free for everyone.
Can This Recipe Support Weight Loss Goals?
Absolutely! These protein-packed Bounty Bars are designed to keep you feeling fuller for longer. The protein powder and healthy fats from coconut help stabilize blood sugar levels, reducing the likelihood of energy crashes and sugar cravings that often derail weight management efforts. With controlled portions and satisfying macronutrients, these bars make it easier to stick to your calorie targets while still enjoying something sweet.
Does This Recipe Fit a High-Protein Lifestyle?
Yes, perfectly. Each bar is fortified with high-quality protein powder, making it an ideal snack for muscle recovery and satiety. Using unsweetened coconut and sugar-free chocolate keeps net carbs minimal, while healthy fats from coconut provide sustained energy. This combination makes the bars suitable for ketogenic and low-carb eating plans without compromising on taste or texture.
My Personal Experience
-
Perfect post-workout recovery: After a heavy gym session, I grab one of these bars and feel my energy replenish without the sugar crash that comes with store-bought alternatives.
-
Satisfies sweet cravings without guilt: When that afternoon sugar craving hits, these bars deliver the sweetness I want while keeping me aligned with my fitness goals.
-
Super simple to make ahead: I whip up a batch on Sunday, and I’m set for the week—each bar stays perfectly fresh in the fridge.
-
Mess-free chocolate dipping: Using two forks to coat the bars in melted chocolate is the game-changer—clean edges, even coating, and no burnt fingers.
-
Actually tastes like the real thing: I’ve served these to friends who couldn’t believe they were “healthy” versions—the texture and flavor are remarkably close to traditional Bounty bars.
Perfect For:
These homemade bars are incredibly versatile—they work brilliantly as a high-protein dessert, a portable post-workout snack, a low-carb breakfast on the go, or a satisfying treat within keto diet plans. They’re also ideal for meal prep, travel snacks, and holiday gift-giving.
Why You’ll Love This Recipe:
-
Packs a protein punch: Each bar delivers a solid protein boost from the added protein powder, making this treat actually work for your fitness goals.
-
Low-carb and keto-friendly: Using unsweetened coconut and sugar-free chocolate keeps net carbs low, perfect for those monitoring carbohydrate intake.
-
No baking required: This recipe comes together entirely without turning on your oven—just mix, chill, and dip.
-
Simple, clean ingredients: With just a handful of pantry staples and no artificial junk, you know exactly what you’re eating.
-
Stays fresh for days: These bars store beautifully in the fridge or freezer, making them perfect for weekly meal prep.
Common Mistakes to Avoid:
-
Not chilling the coconut filling before dipping: If the bars aren’t firm enough, they’ll fall apart when you try to coat them in chocolate. Freeze for at least 30 minutes for best results.
-
Overheating the chocolate: Chocolate can “seize” and become grainy if microwaved too long. Heat in 30-second bursts, stirring between each.
-
Using regular sweetener instead of powdered: Granular sweeteners won’t dissolve properly, resulting in a gritty texture. Always use powdered sweetener for a smooth filling.
-
Skipping the coconut cream layer: Using only the watery part of coconut milk won’t bind the filling properly. Always use the thick, creamy layer from the top of the can.
Required Equipment:
-
Mixing bowl—essential for thoroughly combining coconut, protein powder, and binding ingredients.
-
Parchment paper—prevents sticking and makes it easy to lift the set bars from the pan.
-
8×8-inch square pan—provides the perfect shape for cutting uniform bars.
-
Two forks—make chocolate dipping mess-free and ensure even coating.
-
Microwave-safe bowl—allows quick, even melting of chocolate for coating.
Storage Instructions:
Store your homemade Bounty Bars in an airtight container in the refrigerator for up to two weeks. For longer storage, place them in a freezer-safe container or zip-top bag and freeze for up to three months—they make fantastic grab-and-go snacks straight from the freezer. Layer parchment paper between bars to prevent sticking, and always ensure chocolate is fully set before stacking.
Recipe Details
-
Preparation Time: 15 minutes
-
Cooking Time: 0 minutes (no baking required)
-
Chilling Time: 1 hour
-
Total Time: 1 hour 15 minutes
-
Servings: 10 bars
-
Best Season for This Recipe: All-season
-
Total Calories (Per Serving): Approximately 165 kcal
Short description: A deliciously creamy coconut center wrapped in a rich chocolate coating, boosted with protein powder for a satisfying, guilt-free treat that fits perfectly into a low-carb lifestyle.
📝 Ingredients:
-
1 cup (100g) unsweetened desiccated coconut
-
½ cup (50g) vanilla or unflavored protein powder
-
½ cup (120g) light cream cheese, softened
-
¼ cup (60ml) canned coconut cream (thick layer only)
-
2 tablespoons powdered erythritol or monk fruit sweetener
-
6 ounces (170g) sugar-free dark chocolate chips or chunks
Note: Use full-fat coconut cream for best results—avoid using the watery part at the bottom of the can as it won’t bind properly. If you prefer dairy-free, use a vegan cream cheese alternative.
Directions:
-
Line your pan: Line an 8×8-inch square pan with parchment paper, leaving some overhang on two sides for easy removal.
-
Mix the filling: In a large bowl, combine the desiccated coconut, protein powder, softened cream cheese, coconut cream, and powdered sweetener. Mix thoroughly until a thick, sticky dough forms. The mixture should hold together when pressed—if too dry, add a little more coconut cream.
-
Press into pan: Transfer the mixture to your prepared pan. Press down firmly and evenly using your hands or the back of a spoon. Ensure it’s compacted well to prevent crumbling later.
-
Chill until firm: Place the pan in the freezer for 30–40 minutes, until the coconut mixture is firm enough to cut without falling apart.
-
Cut into bars: Lift the chilled block from the pan using the parchment overhang. Place on a cutting board and use a sharp knife to cut into 10 equal bars. For clean edges, wipe the knife between cuts.
-
Melt the chocolate: In a microwave-safe bowl, melt the sugar-free chocolate chips in 30-second bursts, stirring well after each, until completely smooth and glossy. If the chocolate seems too thick, stir in 1 teaspoon of coconut oil.
-
Dip the bars: Using two forks, dip each chilled bar into the melted chocolate, turning to coat all sides. Allow excess chocolate to drip off, then place the bar back on a parchment-lined tray. Work quickly to keep the chocolate from setting.
-
Set the chocolate: Refrigerate the dipped bars for 20–30 minutes, until the chocolate is fully firm and no longer tacky to the touch.
-
Serve or store: Enjoy immediately or transfer to an airtight container for storage.
Nutrition Facts (Per Serving – Approximate):
-
Calories: 165 kcal
-
Fats: 12g
-
Cholesterol: 8mg
-
Sodium: 65mg
-
Potassium: 210mg
-
Total Carbohydrates: 8g
-
Fiber: 4g
-
Net Carbs: 4g
-
Sugars: 1g
-
Protein: 10g
-
Calcium: 90mg
Nutritional values are approximate and based on ingredient choices. Protein content may vary depending on the protein powder used.
Notes:
-
Storage tip: Keep bars refrigerated for the best texture—they’ll stay firm and fresh for up to two weeks in an airtight container.
-
Freezer-friendly: These bars freeze beautifully for up to 3 months. Place them in a freezer-safe bag with parchment between layers.
-
Allergy notes: This recipe is gluten-free. For dairy-free options, use vegan cream cheese and dairy-free chocolate.
-
Flavor boosts: Add a few drops of vanilla or almond extract to the coconut filling for extra depth. For an Almond Joy variation, press a whole almond into each bar before dipping.
Frequently Asked Questions:
How long do these high-protein Bounty bars last?
They stay fresh in the refrigerator for up to 2 weeks and can be frozen for up to 3 months.
Can I use whey or plant-based protein powder?
Either works well—use your preferred protein powder. Just note that plant-based varieties may alter the texture slightly, so adjust coconut cream as needed.
Are these bars truly low-carb?
Yes, with only 4g net carbs per serving using sugar-free sweetener and unsweetened coconut, they fit perfectly into a ketogenic diet.
Can I make these bars vegan?
Absolutely—use dairy-free cream cheese and ensure your chocolate chips are certified vegan.
How do I prevent the bars from falling apart when dipping?
Freeze the coconut bars thoroughly before dipping—this ensures they stay intact during coating.
Can I add more protein powder to boost the protein content?
You can add up to ¾ cup, but be aware that too much protein powder may make the filling dry and crumbly. Add extra coconut cream to compensate.
AdBlock Detected ⚠️
Please disable your ad blocker to support our website.
Advertising keeps our content free for everyone.