Description
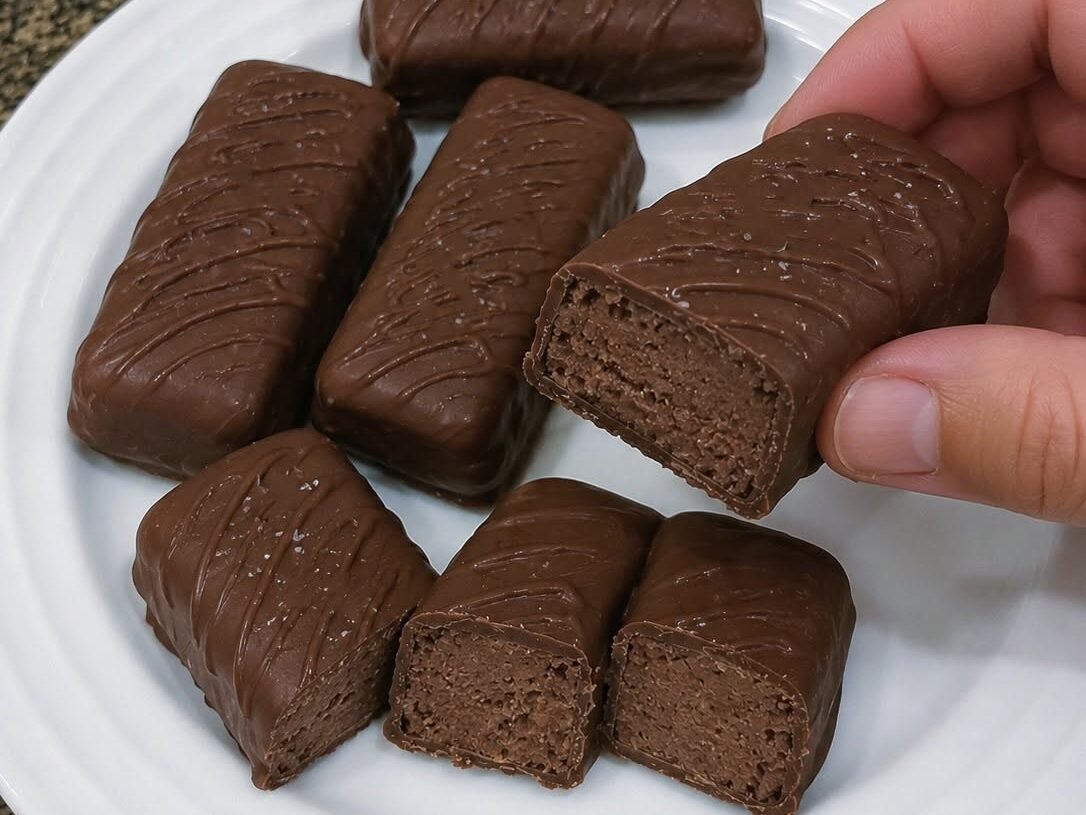
This healthier take on the classic fluffy chocolate bar delivers the same light, airy, melt-in-your-mouth texture—but with a protein-packed twist. Each bite combines a creamy, whipped nougat center with a crisp sugar-free chocolate shell, satisfying your sweet cravings without the sugar crash. It’s the perfect high-protein, low-carb treat for anyone who loves candy but wants to stick to their fitness goals.
AdBlock Detected ⚠️
Please disable your ad blocker to support our website.
Advertising keeps our content free for everyone.
Can This High-Protein Musketeer Candy Support Weight Loss Goals?
Yes! This recipe replaces sugar-laden corn syrup and empty carbs with high-quality protein powder and sugar-free sweeteners. Protein helps keep you feeling full and satisfied, which can reduce overall calorie intake and prevent mindless snacking . With around 15–18 grams of protein per serving and minimal net carbs, this candy supports muscle recovery and helps stabilize blood sugar levels—key factors in a weight management plan.
Does It Fit a High-Protein Lifestyle?
Absolutely. Each bar delivers approximately 15–18 grams of protein from whey or plant-based powder, with fewer than 6 grams of net carbs when using sugar-free sweeteners and chocolate. The filling relies on whipped cream or coconut cream for that classic fluffy texture, while the coating uses sugar-free dark chocolate. This makes it ideal for low-carb, keto, and high-protein diets, offering a guilt-free indulgence that works with your macros.
My Personal Experience
-
Texture triumph: The first time I bit into one of these bars, I couldn’t believe it wasn’t the real thing. The combination of frozen whipped cream and protein powder creates that same fluffy, airy center that melts on your tongue.
-
Sweet tooth satisfied: I’ve made these bars for every family gathering, and they disappear within minutes. Even my kids prefer them to store-bought candy now—they love the rich chocolate coating and soft interior.
-
Meal prep favorite: I make a double batch every Sunday for the week ahead. Having these in my freezer has completely eliminated my afternoon candy cravings and keeps me from hitting the vending machine.
-
Customizable magic: I’ve experimented with different flavor extracts, and each one has been a hit. The mint chocolate version is now a permanent fixture in my dessert rotation.
-
Gift-giving gem: These bars look so professional wrapped in parchment and tied with twine. I’ve given them as homemade gifts, and everyone asks for the recipe.
Perfect For
-
High-protein snacks after a workout or during an afternoon energy slump
-
Low-carb desserts that don’t derail your keto diet plans
-
Post-workout recovery with 15+ grams of protein per bar
-
Meal prep treats that stay fresh in the freezer for weeks
-
Healthy gift-giving for friends and family who appreciate clean eating
-
Birthday parties and gatherings where you want a crowd-pleasing healthier option
Why You’ll Love This Recipe
-
Tastes just like the real thing—the fluffy, airy center combined with crisp chocolate coating perfectly mimics the classic candy bar texture.
-
No baking or special equipment needed—just a mixing bowl, a pan, and your freezer. No candy thermometer or complicated techniques required.
-
Fits your macros beautifully—with approximately 15–18g protein and under 6g net carbs per serving, it supports both high-protein and keto lifestyles .
-
Customizable flavors—easily swap vanilla for mint, strawberry, or peanut butter to create endless variations and keep things exciting.
-
Perfect for meal prep—make a batch on Sunday and enjoy a healthy treat all week. They stay fresh in the freezer for up to 2 months.
Common Mistakes to Avoid
-
Not chilling the filling long enough—if you don’t freeze the center for at least 1–2 hours, it will be too soft to dip in chocolate, causing a messy coating process .
-
Using the wrong protein powder—whey protein creates the fluffiest texture, while plant-based proteins can result in denser bars. Choose a high-quality vanilla or unflavored whey for best results .
-
Overheating the chocolate—melting chocolate in the microwave without stirring every 20–30 seconds can cause it to seize and become grainy. Take it slow for a smooth, glossy coating .
-
Skipping the coconut oil in the coating—without coconut oil, the chocolate coating may be too thick and crack when you bite into the bar. Adding 1 teaspoon ensures a smooth, even coat.
Required Equipment
-
Mixing bowl—essential for combining the filling ingredients into a smooth, fluffy mixture.
-
Hand or stand mixer—makes whipping the cream and incorporating protein powder effortless, creating that light, airy texture.
-
Loaf pan or baking dish (lined with parchment paper)—shapes the filling into a perfect rectangle for easy cutting into bars .
-
Parchment paper—prevents sticking and allows you to lift the set filling out of the pan with ease.
-
Microwave-safe bowl—for melting chocolate chips and coconut oil in short bursts without scorching.
Storage Instructions
Refrigerator: Store bars in an airtight container for up to 1 week. Keep them chilled to maintain the fluffy texture and prevent the chocolate from softening .
Freezer: For longer storage, place bars in a freezer-safe container or individually wrap them in plastic wrap. They’ll stay fresh for up to 2 months—perfect for meal prep .
Serving tip: Let bars sit at room temperature for 3–5 minutes before eating for the perfect soft, melt-in-your-mouth texture .
Recipe Details
-
Preparation Time: 15 minutes
-
Freezing Time: 2–3 hours
-
Total Time: Approximately 2 hours 15 minutes
-
Servings: 6–8 bars
-
Best Season for This Recipe: All-season
-
Total Calories (Per Serving): Approximately 120–220 (estimate, varies by ingredients used)
This healthier copycat transforms the classic fluffy candy bar into a protein-packed, low-carb treat that tastes just as indulgent as the original.
📝 Ingredients
For the Fluffy Protein Filling:
-
1 cup heavy whipping cream or full-fat coconut cream (solid part only, if using coconut cream, chill the can overnight)
-
½ cup vanilla or unflavored whey protein powder (whey works best for fluffiness)
-
1–2 tablespoons powdered erythritol or monk fruit sweetener (adjust to taste)
-
1 teaspoon vanilla extract
-
Pinch of salt (enhances chocolate flavor)
For the Chocolate Coating:
-
½ cup sugar-free dark chocolate chips (Lily’s or similar brand)
-
1 teaspoon coconut oil (for smooth, glossy coating)
Directions
-
Whip the cream: In a large mixing bowl, beat the heavy cream or chilled coconut cream with a hand mixer until soft peaks form. This usually takes 2–3 minutes on medium-high speed.
-
Add dry ingredients: Fold in the protein powder, erythritol, vanilla extract, and salt. Mix until the batter is smooth, thick, and fluffy—it should have a mousse-like consistency .
-
Chill the filling: Transfer the mixture to a parchment-lined loaf pan or baking dish. Spread it evenly, smoothing the top with a spatula. Freeze for 1–2 hours, or until firm enough to cut .
-
Shape the bars: Remove from the freezer and lift the filling out using the parchment paper. Cut into 6–8 evenly sized bars or rectangles .
-
Melt the chocolate: Combine chocolate chips and coconut oil in a microwave-safe bowl. Heat in 20–30 second bursts, stirring between each, until smooth and glossy .
-
Coat the bars: Dip each frozen bar into the melted chocolate, ensuring full coverage. Use a fork to lift and let excess chocolate drip off. Place coated bars back on the parchment-lined tray .
-
Final freeze: Return the coated bars to the freezer for 5–10 minutes until the chocolate is completely set .
-
Serve: Enjoy chilled for the best texture. Let bars sit at room temperature for 3–5 minutes for a softer center .
Nutrition Facts (Per Serving – Approximate)
-
Calories: 120–220
-
Fats: 8–12g
-
Cholesterol: Varies by ingredients
-
Sodium: 65–70mg
-
Potassium: Varies by ingredients
-
Total Carbohydrates: 5–16g
-
Fiber: 1–2g
-
Net Carbs: 4–6g (using sugar-free sweeteners and chocolate)
-
Sugars: 1–2g
-
Protein: 15–18g
-
Calcium: 20mg (varies by protein powder brand)
Nutrition estimates vary based on specific brands and ingredients used.
Notes
Storage: Keep bars in an airtight container in the refrigerator for up to 1 week, or freeze for up to 2 months. Always thaw for 3–5 minutes before serving for the best texture .
Reheating: No reheating is necessary—these are best enjoyed cold or slightly thawed.
Allergy Notes: This recipe is gluten-free but contains dairy (if using whey protein and cream). For a dairy-free version, use coconut cream and plant-based protein powder.
Flavor Boosts: Add ½ teaspoon peppermint extract for mint chocolate bars, or stir in 1 tablespoon powdered peanut butter for a nutty twist .
Frequently Asked Questions
Can I use a different protein powder?
Yes, but whey protein creates the fluffiest texture; plant-based proteins may result in denser bars .
Can I use regular chocolate chips instead of sugar-free?
Yes, but the recipe will no longer be low-carb or keto-friendly .
Why is my filling too soft to dip?
The filling likely wasn’t frozen long enough—freeze for at least 2 hours before coating .
How do I make these bars higher in protein?
Add an extra scoop of protein powder, use high-protein chocolate chips, or mix in collagen powder .
Can I make these without a hand mixer?
Yes, but whipping the cream by hand will take significantly longer—about 10–15 minutes of vigorous whisking.
What sweetener works best?
Powdered erythritol or monk fruit sweetener dissolves easily and doesn’t affect texture—stevia can also work but may have an aftertaste .
AdBlock Detected ⚠️
Please disable your ad blocker to support our website.
Advertising keeps our content free for everyone.