Introduction:
When you’re following a keto or low-carb diet, finding desserts that are both satisfying and delicious can often feel like a challenge. Traditional chocolate mousse, with its rich and creamy texture, is an indulgence many people miss. But with this Keto-Friendly Chocolate Mousse, you can enjoy all the creamy, chocolatey goodness of the classic dessert without the guilt of excess sugar or carbs. This recipe uses low-carb ingredients, making it perfect for anyone following a ketogenic diet, Weight Watchers (WW), or just looking for a healthier alternative to traditional sweets.
The beauty of keto desserts lies in their ability to satisfy your sweet tooth without spiking your blood sugar or kicking you out of ketosis. By substituting sugar with a low-carb sweetener and using heavy cream to create a decadent texture, this chocolate mousse is rich, velvety, and downright irresistible. Whether you’re enjoying a quiet night at home or need a quick and easy dessert for a special occasion, this mousse is the perfect treat. In this comprehensive guide, we’ll walk you through the entire process, from the ingredients and instructions to detailed nutritional information and SmartPoints breakdowns.
Ingredients for Keto-Friendly Chocolate Mousse:
To make a smooth, creamy, and keto-friendly chocolate mousse, you’ll need the following ingredients:
For the Chocolate Mousse:
- 1 cup heavy whipping cream (whipped to stiff peaks)
- 1/4 cup unsweetened cocoa powder (look for high-quality cocoa to enhance flavor)
- 1/4 cup powdered erythritol or any preferred keto-friendly sweetener (Swerve, Stevia, or monk fruit sweetener)
- 1/2 teaspoon vanilla extract (for added flavor)
- 1/4 teaspoon instant coffee granules (optional, enhances chocolate flavor)
- Pinch of salt (to balance sweetness)
- 3 ounces sugar-free dark chocolate (minimum 85% cocoa, chopped)
Optional Garnishes:
- Whipped cream (unsweetened, for topping)
- Chocolate shavings (sugar-free)
- Fresh berries (raspberries or strawberries pair well with chocolate)
- Mint leaves (for garnish and extra freshness)
- Crushed nuts (optional, for added crunch and texture)
Kitchen Tools Needed:
Before you start, gather these tools to make the process smooth and efficient:
- Electric hand mixer or stand mixer (for whipping the cream)
- Medium mixing bowls (for the mousse and whipped cream)
- Double boiler or microwave-safe bowl (for melting the chocolate)
- Spatula (for folding the ingredients)
- Measuring cups and measuring spoons (for precise measurements)
- Whisk (for mixing the cocoa powder into the whipped cream)
- Serving glasses or small bowls (for serving the mousse)

Step-by-Step Instructions:
Step 1: Melt the Sugar-Free Dark Chocolate
Begin by melting the 3 ounces of sugar-free dark chocolate. The easiest method is to use a double boiler. Place the chopped chocolate into the top bowl of the double boiler, making sure the bottom bowl does not touch the water. Heat gently over medium-low heat, stirring occasionally until the chocolate has completely melted.
Alternatively, you can microwave the chocolate. Place the chopped chocolate into a microwave-safe bowl and heat in 20-30 second intervals, stirring in between, until fully melted and smooth.
Once melted, set the chocolate aside to cool slightly while you prepare the whipped cream mixture.
Step 2: Whip the Heavy Cream
In a large mixing bowl, pour the 1 cup of heavy whipping cream. Use an electric hand mixer (or stand mixer) to whip the cream until it forms stiff peaks. This will take about 2-3 minutes at high speed. Be careful not to overwhip, as the cream could turn into butter. Once whipped, set it aside.
Step 3: Mix the Cocoa Powder and Sweetener
In a separate bowl, combine the 1/4 cup unsweetened cocoa powder, 1/4 teaspoon instant coffee granules (optional, but it enhances the chocolate flavor), 1/4 teaspoon salt, and 1/4 cup powdered erythritol or your preferred keto-friendly sweetener. Whisk the ingredients together until they are fully combined. The coffee granules will dissolve into the cocoa, giving the mousse a deeper, more robust chocolate flavor.
Step 4: Combine the Ingredients
Now, gently fold the cocoa powder mixture into the whipped cream. Use a rubber spatula or whisk to combine them carefully, ensuring you don’t deflate the whipped cream. The goal is to maintain the light and airy texture of the cream while incorporating the cocoa and sweetener. Once the mixture is well combined, add the melted sugar-free dark chocolate and continue folding until everything is evenly distributed.
Step 5: Chill the Mousse
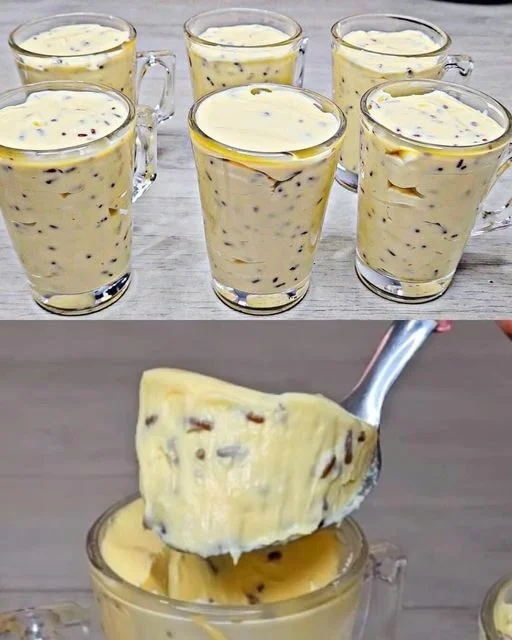
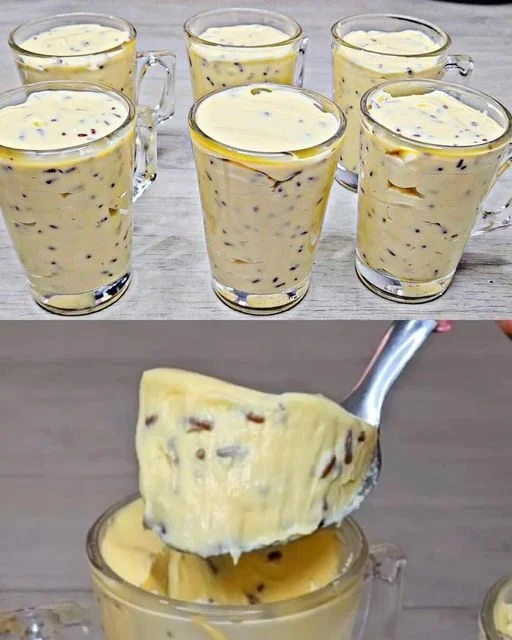
Once your mousse mixture is fully combined, transfer it to serving glasses or small bowls. Place the mousse in the refrigerator for at least 2-3 hours, allowing it to firm up and chill. If you want a firmer mousse, you can let it chill overnight.
Step 6: Garnish and Serve
Before serving, top each mousse with a dollop of unsweetened whipped cream, a sprinkle of sugar-free chocolate shavings, a few fresh berries, and a mint leaf for extra freshness. The added garnishes bring color, flavor, and texture to the mousse, but feel free to keep it simple with just whipped cream if you prefer.
Nutritional Breakdown:
This Keto-Friendly Chocolate Mousse is rich, creamy, and perfectly satisfying, all while being low in carbs and sugars. Below is the approximate nutritional information per serving (assuming the recipe makes 4 servings):
- Calories: 250 kcal
- Fat: 24g
- Saturated Fat: 14g
- Carbohydrates: 5g
- Fiber: 3g
- Net Carbs: 2g
- Protein: 3g
- Sugar: 1g (natural from cocoa powder and chocolate)
- Sodium: 35mg
- Cholesterol: 70mg
WW SmartPoints Breakdown:
For those following the Weight Watchers (WW) program, here’s the SmartPoints breakdown per serving:
- SmartPoints (Green Plan): 6 points
- SmartPoints (Blue Plan): 5 points
- SmartPoints (Purple Plan): 4 points
These SmartPoints values are for the mousse with no garnishes. Adding whipped cream or chocolate shavings may add 1-2 SmartPoints, so keep that in mind if you are closely tracking your points.
Tips for Making the Best Keto Chocolate Mousse:
- Use High-Quality Chocolate: The quality of your sugar-free dark chocolate will greatly affect the flavor of your mousse. Look for chocolate with at least 85% cocoa to ensure a rich, deep flavor. Brands like Lily’s or ChocZero offer excellent sugar-free options that are keto-friendly.
- Adjust Sweetness to Taste: If you prefer a sweeter mousse, you can add a little extra sweetener. Since everyone’s taste buds are different, start with the recommended amount of erythritol and taste the mixture before chilling. Adjust accordingly.
- Don’t Overwhip the Cream: It’s crucial not to overwhip your cream, as doing so will result in a buttery texture. Stop as soon as stiff peaks form, and be gentle when folding in the chocolate mixture.
- Chill for Maximum Texture: Allowing the mousse to chill for at least a few hours helps it set properly and develop the smooth, creamy texture you’re looking for. You can also chill it overnight for an even firmer texture.
- Customize the Garnishes: Feel free to experiment with different toppings! Fresh berries like raspberries, strawberries, or even blueberries add a refreshing contrast to the richness of the mousse. Alternatively, you could sprinkle some unsweetened coconut flakes or chopped nuts for an added crunch.
Storing and Reheating:
Storage: The mousse can be stored in an airtight container in the refrigerator for up to 4 days. It’s best enjoyed cold, so avoid leaving it out at room temperature for extended periods.
Freezing: If you want to make this mousse ahead of time, you can freeze it for up to 1 month. Allow it to thaw in the fridge for several hours before serving, as freezing may slightly alter the texture.
Conclusion:
This Keto-Friendly Chocolate Mousse is a perfect treat for anyone who wants to enjoy the decadence of chocolate mousse without the carbs or sugar. Whether you are on a keto diet, following Weight Watchers, or simply looking for a low-carb dessert option, this recipe fits the bill. With its creamy texture, rich chocolate flavor, and low carb count, it’s sure to become a go-to in your dessert rotation.
The best part is that this mousse is easy to make, can be prepared ahead of time, and is customizable with different toppings to suit your preferences. So, go ahead and treat yourself to this delightful, guilt-free dessert—your taste buds will thank you!
